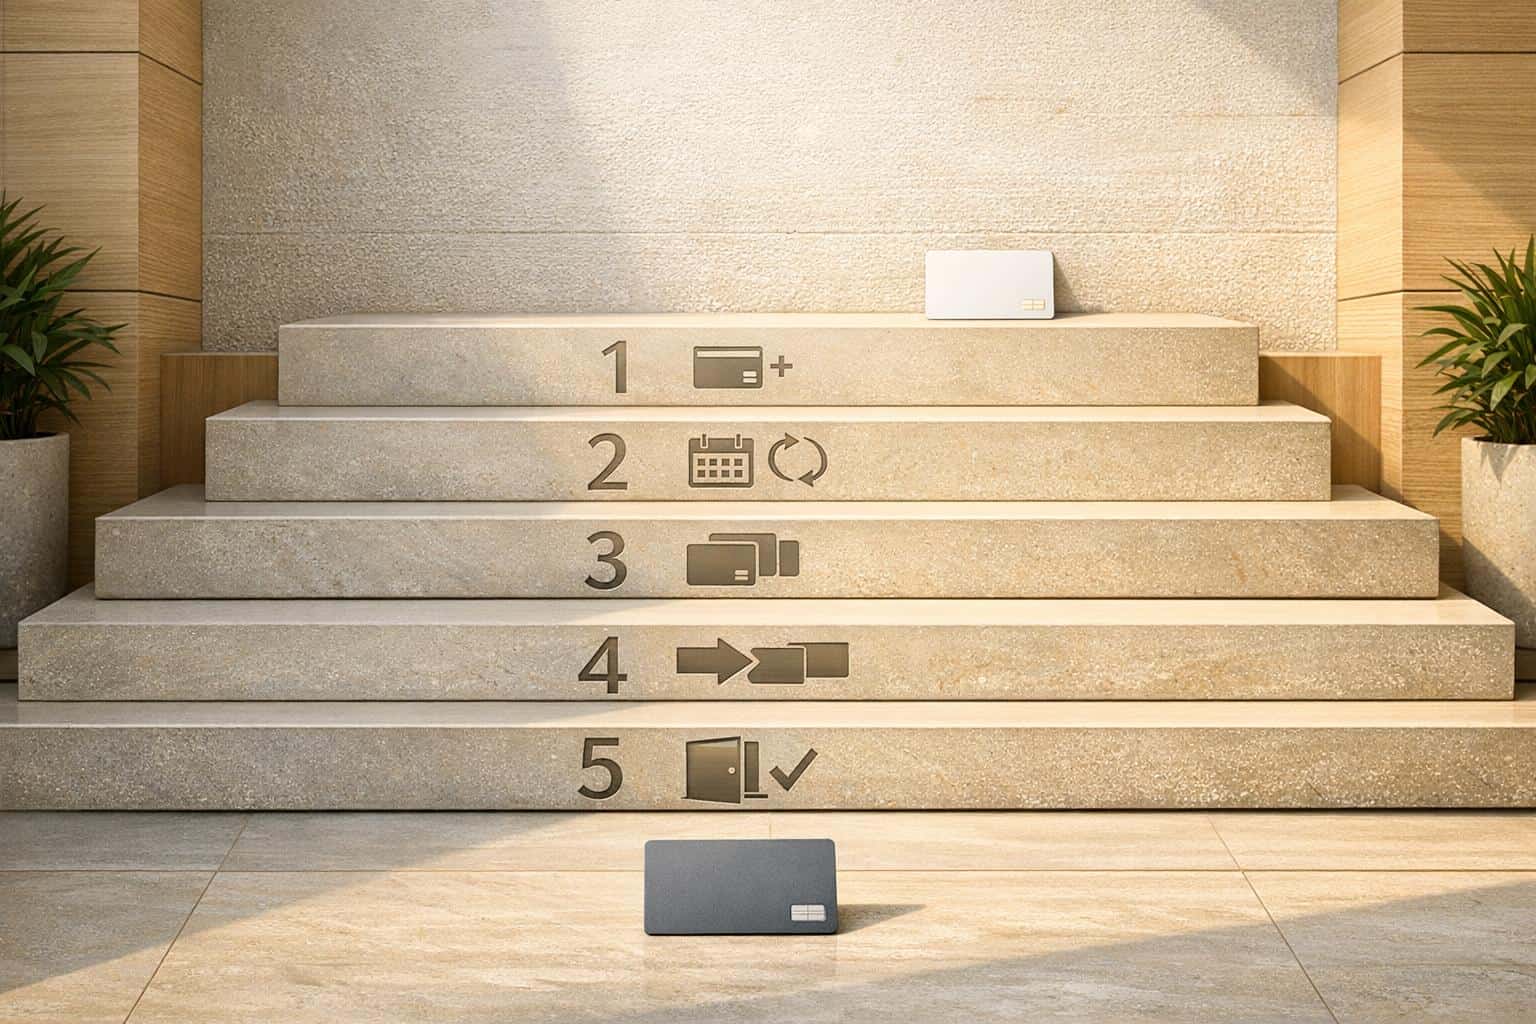
Switching banks can feel like a hassle, but it doesn’t have to be. By following these five straightforward steps, you can transition to a new bank without missing a paycheck or payment:
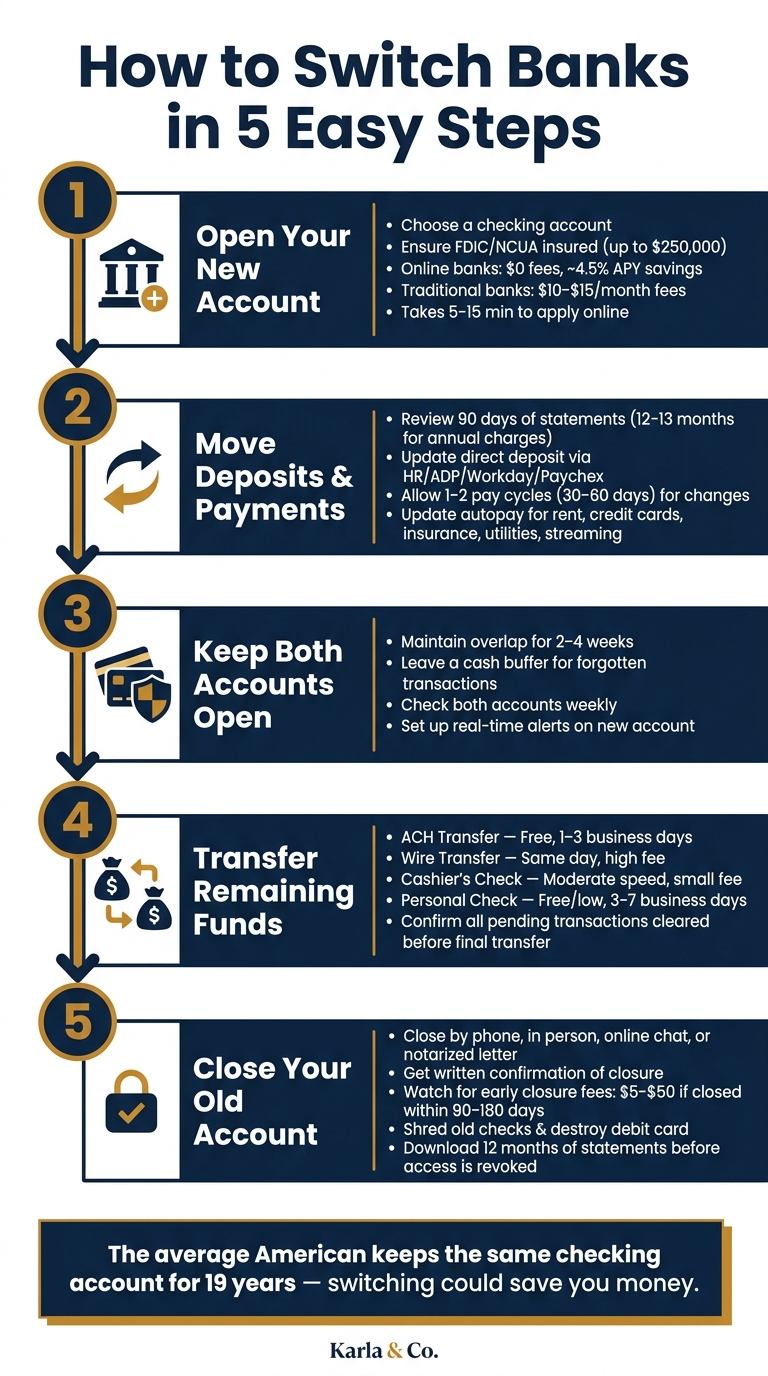
- Open Your New Account: Choose the right account type, ensure it’s FDIC-insured, and set up online banking for convenience.
- Move Deposits and Payments: List all recurring transactions, update your direct deposit, and switch automatic payments to avoid missed bills.
- Keep Both Accounts Open: Maintain both accounts for 2–4 weeks to catch any pending transactions or forgotten subscriptions.
- Transfer Remaining Funds: Once everything is running smoothly, move your remaining balance using methods like ACH transfers or checks.
- Close Your Old Account: Confirm all transactions are cleared, then close the account and get written confirmation for your records.
Allow a few weeks for the process to ensure smooth transitions and avoid surprises. Switching banks can save you money and align your finances with your goals.
How to Switch Banks in 5 Easy Steps
E215: How to Switch Banks (In 5 Steps)
Step 1: Open Your New Bank Account
Before you start transferring payments or funds, make sure to open your new bank account. This gives you a secure place for your money and helps keep the entire process on track. Think of it as setting up the groundwork for a smooth transition of deposits and payments.
Choose the Right Account Type
Begin with a checking account – it’s the go-to option for everyday transactions like paying bills, using a debit card, or receiving your paycheck. If you’re planning to set up an emergency fund, consider opening a savings account at the same bank for convenience.
Take a close look at the fee structures. Traditional banks often charge $10–$15 monthly fees if you don’t meet their minimum balance requirements, while many online banks offer fee-free accounts. Plus, online banks typically provide much better interest rates on savings – some offer around 4.5% APY compared to as little as 0.01% at certain traditional banks. A helpful tip: ask if setting up direct deposit can waive any monthly fees your bank might charge.
"The right bank for you should provide the access, support and value that fits your financial goals." – U.S. Bank
Don’t forget to ensure the bank is FDIC-insured (or NCUA-insured if it’s a credit union). This guarantees your deposits are protected up to $250,000 per person, per institution. You can confirm this quickly using the FDIC’s BankFind tool online.
Once you’ve picked the right bank and account type, gather the necessary documents to make the setup process quick and easy.
What You Need to Open a U.S. Bank Account
Here’s what you’ll need to get started:
- A government-issued photo ID, like a driver’s license, U.S. passport, or state ID
- Your Social Security Number (SSN) or an ITIN if you don’t qualify for an SSN
- Proof of address, such as a utility bill or lease agreement dated within the last 60 days
- An initial deposit, which could range from $0 at online banks to $25–$100 at traditional banks
If you’re applying online, the process usually takes about 5–15 minutes, and approval is often instant. However, if you’re applying with an ITIN or have a more complex situation, visiting a branch in person might make things easier.
Set Up Online Banking and Account Alerts
Once your account is open, enroll in online banking and download the bank’s mobile app right away. Set up alerts to keep tabs on your account activity – real-time transaction updates, low balance warnings, and security notifications can all help you stay in control. For extra peace of mind, configure alerts to flag transactions over a specific amount so you can quickly catch any unusual activity. Finally, double-check that your mobile number and email address are current, as these are essential for receiving security codes and updates.
Step 2: Move Your Deposits and Payments to the New Account
Now that your new account is ready, it’s time to shift all deposits and payments over. Missing an autopay can lead to fees, canceled subscriptions, or even credit issues, so this step requires your full attention.
List All Recurring Transactions
Start by reviewing your bank statements from the past 90 days to identify recurring transactions – both deposits and payments. While monthly charges are easy to spot, don’t overlook less frequent ones like quarterly insurance premiums or annual subscriptions for software or professional memberships. For a thorough review, check 12 to 13 months of statements.
Many banks, including Chase, Bank of America, Wells Fargo, and Capital One, offer features like "Recurring payments" or "Subscriptions" in their mobile apps, which can speed up this process. Be sure to check for payments linked to apps like Venmo, PayPal, or Cash App, as well as automatic transfers to brokerage accounts such as Fidelity or Robinhood. Also, watch out for smaller charges that are easy to miss, like cloud storage fees, credit monitoring services, or annual donations.
"The goal is not speed. The goal is to avoid missed paychecks, bounced payments, overdrafts, duplicate withdrawals, and forgotten subscriptions." – Money Fit
To simplify, here’s a quick reference table for common categories of recurring transactions:
| Category | Items to Look For |
|---|---|
| Income | Paychecks, Social Security, pensions, tax refunds, side-gig payments |
| Household | Rent/mortgage, utilities, internet, phone, insurance, HOA fees |
| Financial | Credit card autopay, student loans, auto loans, savings transfers |
| Lifestyle | Gym memberships, streaming services, cloud storage, recurring donations |
| Linked Apps | Venmo, PayPal, Cash App, Zelle, brokerage accounts (Fidelity, Robinhood) |
Once you’ve documented all recurring transactions, you’re ready to update your direct deposit information.
Update Your Direct Deposit
Start with your direct deposit – it’s the foundation for a smooth transition. Ensuring your paycheck lands in the new account first provides a stable balance to cover payments as you switch them over.
To update your direct deposit, reach out to your HR department or use your employer’s self-service portal. Many companies rely on platforms like ADP, Workday, or Paychex, where you can make the change yourself. You’ll need your new bank’s 9-digit routing number and your account number, which you can find in your bank’s mobile app or on a voided check. Some banks even offer a pre-filled direct deposit authorization form you can hand directly to HR.
Keep in mind that direct deposit changes can take 1–2 pay cycles (30–60 days for federal benefits) to process. Always confirm that your first paycheck has successfully landed in the new account before moving on to update other transactions. For Social Security, visit ssa.gov/myaccount or call 1-800-772-1213. For VA benefits, head to VA.gov or call 1-800-827-1000.
"Direct deposit changes typically take 1–2 full pay cycles to take effect. Confirm the first paycheck has actually landed in the new account before doing anything else." – Victoria Grover, Compliance Specialist, Branchspot
Update Automatic Payments
Once your income is flowing into the new account, it’s time to update all your recurring bills. Log in to each biller’s website or app to update your payment details.
Start with critical bills like rent or mortgage, credit cards, and insurance. Missing these can have serious consequences – a missed credit card payment can impact your credit score within 30 days, and a lapsed insurance policy could leave you unprotected. After handling the essentials, move on to utilities, internet, and lower-priority subscriptions like streaming services.
Keep in mind that subscriptions tied to your old debit card number won’t update automatically when you change your account details. You’ll need to manually update those with the new card’s 16-digit number. If you use digital wallets like Apple Pay or Google Pay, update your card information there as well, and double-check whether linked subscriptions are updated. Don’t forget to audit saved payment profiles on shopping platforms like Amazon, where your old card details may still be stored.
Step 3: Keep Both Accounts Open During the Transition
When you’re switching banks, it’s a smart move to keep both accounts active for a few weeks – ideally 2–4 weeks. This overlap helps ensure you don’t miss any payments or encounter overdraft fees due to overlooked transactions. Think of it as a safety net while your new account gets fully up and running.
Leave a Buffer in Your Old Account
Make sure to leave some extra cash in your old account. This cushion covers any forgotten subscriptions, pending payments, or uncleared checks. It’s also a good idea to maintain enough funds to meet the minimum balance requirements, so you can avoid unnecessary fees.
"Keep it open with a small balance for at least 30 days after you think you’ve transferred everything. Stragglers happen. This buffer period catches them before they cause problems." – Magan Catney, Western Bank
The FDIC also advises against closing your account too soon. If you shut it down before all pending transactions clear, you could end up with fees or other complications.
Check Both Accounts Often
During this transition period, make it a habit to check both accounts regularly – once a week is a good rule of thumb. This helps you confirm that deposits and payments are being processed correctly. To stay on top of things, set up real-time text or email alerts for your new account. These notifications will let you know immediately when a transaction takes place. If you use a budgeting app, link both accounts to keep track of all activity in one place.
Start Using Your New Account for Daily Spending
Once your first direct deposit hits your new account, start using your new debit card for everyday purchases. After a full billing cycle with no activity in your old account, you’ll know it’s safe to close it.
sbb-itb-0a60575
Step 4: Move Remaining Funds and Clear Pending Transactions
Once you’ve confirmed that direct deposits and payments are functioning correctly with your new account, it’s time to transfer any remaining funds and ensure all transactions on your old account are finalized.
Transfer Your Remaining Balance
You can move your remaining balance using several methods, depending on the amount and how quickly you need the funds transferred:
- ACH Transfer: This is free and typically takes 1–3 business days. It’s a reliable option for most transfers.
- Cashier’s Check: Ideal for larger sums that need quicker processing. A small fee may apply.
- Personal Check: A good choice for non-urgent transfers, but be aware of longer hold times before the funds are available.
- Wire Transfer: The fastest option, with same-day delivery, but it comes with a higher fee.
| Transfer Method | Speed | Cost |
|---|---|---|
| ACH / Electronic | 1–3 business days | Free |
| Cashier’s Check | Moderate | Small fee |
| Personal Check | 3–7 business days | Free/Low |
| Wire Transfer | Same day | High fee |
"Using a personal check may be cheaper than using a cashier’s check, but there may be a longer wait before it is available in your new account." – Consumer Financial Protection Bureau
After transferring your funds, double-check that no pending transactions are left on the old account.
Confirm All Pending Transactions Are Cleared
Before completing the process, ensure that all pending transactions tied to your old account have been processed. Take a close look at your recent account statements:
- Review the last 90 days for any recurring payments.
- Check up to 12 months for annual charges.
- Verify if there are any paper checks you’ve written, as these remain valid for up to six months from the date they were issued.
"An outstanding check presented to a closed account will bounce, costing both you and the recipient a returned-check fee." – Victoria Grover, Compliance Specialist, Branchspot
Only transfer the final balance once you’re certain all transactions have cleared. As Zolzaya Erdenebileg of Mercury advises: "Make sure the balance is zero and all pending transactions have cleared before closing." When your balance is at zero and there are no lingering transactions, you’re ready to close your old account.
Step 5: Close Your Old Account
With your funds transferred and transactions cleared in Step 4, it’s time to wrap things up by closing your old account. Once your balance hits zero and all transactions are finalized, you can officially close the account. Here’s how to ensure a smooth process.
Follow the Steps to Close the Account
Most banks offer several ways to close an account: over the phone, in person at a branch, through secure online chat, or by submitting a notarized written request. No matter which option you choose, the bank will usually require your account balance to be zero or positive before proceeding.
A common mistake is skipping the step of getting written confirmation of the account closure. The Consumer Financial Protection Bureau advises obtaining this document to protect yourself from unexpected fees or accidental reactivation down the line. The confirmation should include the following:
| Item to Confirm | Why It Matters |
|---|---|
| Date of Closure | Establishes when the bank’s responsibility for fees ends. |
| Final Account Balance | Confirms the account was at $0 and ensures no funds are missing. |
| "Good Standing" Status | Important for future banking applications and ChexSystems reports. |
| Final Transfer Details | Provides proof of how any remaining funds were handled (e.g., check or transfer). |
Be aware that some banks may charge an early closure fee if you shut down an account within 90 to 180 days of opening it. These fees typically range from $5 to $50. For instance, U.S. Bank and PNC might charge around $25 if you close an account within 180 days. If you’re nearing the end of that period, it might be worth waiting a few extra weeks to avoid the fee.
Another potential issue to watch for: some banks, like Capital One, warn that closed accounts can occasionally be reopened if automatic deposits or withdrawals continue to hit them. Known as "zombie transactions", these can lead to unexpected fees. To avoid this, monitor for any lingering activity after the closure.
Safely Dispose of Old Materials
Once the account is closed, securely dispose of any related materials. Shred unused checks and destroy your debit card by cutting through the chip and magnetic stripe. Dispose of each piece separately for added security. If you had a safe deposit box at the bank, be sure to empty it, as access usually requires an active account.
Before your online access is revoked, download the past 12 months of statements and any tax-related documents, like 1099-INT forms. Keep your final statement showing a zero balance as proof that the account was closed properly.
After disposing of physical materials, update your financial records to reflect the closure.
Update Your Budget and Financial Records
With the account officially closed, take a moment to update your budgeting tools and financial records. Adjust your budgeting apps, digital wallets, and payment profiles to reflect the new account.
If you need help reorganizing your finances after the switch, Karla & Co. (https://karlaandco.com) offers straightforward personal finance advice to keep you on track.
Conclusion: You Can Switch Banks Without the Stress
Switching banks doesn’t have to feel overwhelming. By breaking the process into five clear steps, you can make the transition seamless. Start by opening a new account, then move your deposits and payments. Keep both accounts open for a short time, transfer any remaining funds, and only then close the old account. Each step builds logically on the one before it, ensuring nothing gets overlooked.
It’s smart to allow 2–4 weeks for billing cycles to settle before fully closing your old account. Trying to rush through this process is often where mistakes happen.
"A short overlap period and deliberate steps turn switching into a controlled handoff." – Mercury
Did you know the average American sticks with the same checking account for 19 years? If your bank is charging fees that don’t align with your needs, switching to a better option can save you money. As Brian Walsh, CFP® and Head of Advice & Planning at SoFi, explains:
"If you see that your bank is hitting you with one or more monthly fees, you may be able to cut your monthly spending by switching to a less expensive bank, or going with an online-only financial institution, which tend to offer low or no fees." – Brian Walsh, CFP® and Head of Advice & Planning at SoFi
Looking for more straightforward tips on managing your finances? Check out Karla & Co. for advice on budgeting, debt management, and other practical money strategies.
FAQs
How much money should I leave in my old account while switching?
When transitioning to a new bank account, it’s wise to leave a small amount of money in your old account. This ensures you can cover any unexpected charges, outstanding checks, or forgotten subscriptions without risking overdraft fees. Keep the account open for one to two additional statement cycles to allow all pending transactions to process. During this time, make sure to maintain at least the minimum balance required by your old bank to avoid any monthly service fees before officially closing the account.
What should I do if a payment or deposit still hits my old account?
If payments or deposits are still being sent to your old account, make sure to update your payment details or direct deposit instructions with the sender immediately. To avoid any missed transactions, keep your old account open for an additional one to two statement cycles. During this period, monitor both accounts closely to catch and redirect any lingering transactions before closing the old account.
Will closing my old account hurt my credit score?
No, closing a bank account won’t impact your credit score. That’s because checking and savings accounts aren’t reported to credit bureaus. However, it’s important to make sure the account doesn’t have a negative balance. Any unpaid debts could be sent to collections, which would hurt your score. Also, confirm that no automatic payments – like credit card bills or loan repayments – are tied to the account. This helps you avoid the risk of missed payments.
Related Blog Posts
- Why Budgets Fail: Common Mistakes Explained
- How Overdraft Fees Work And How To Avoid Them
- How to Rebuild an Empty Emergency Fund
- How to Budget for Big-Ticket Items

Karla Moss is a CPA and former startup Controller who spent 15 years managing finance at the executive level — including inside a company that grew to unicorn status. She founded Karla & Co. to bring real-world financial clarity to everyday money decisions. She’s based in Phoenix, AZ and writes from personal experience as much as professional expertise.